
Snowman Friends Cake Decoration Recipe
Introduction
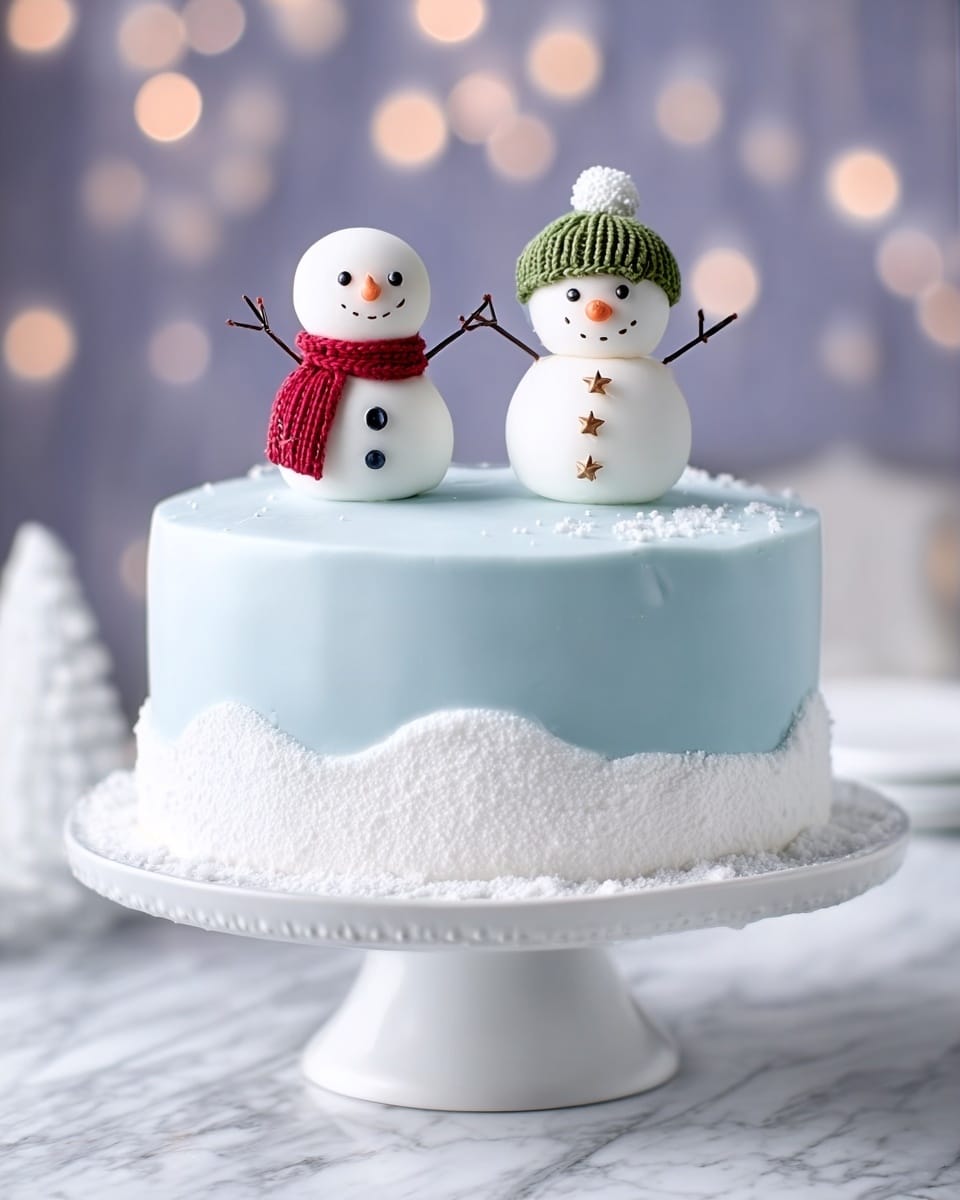
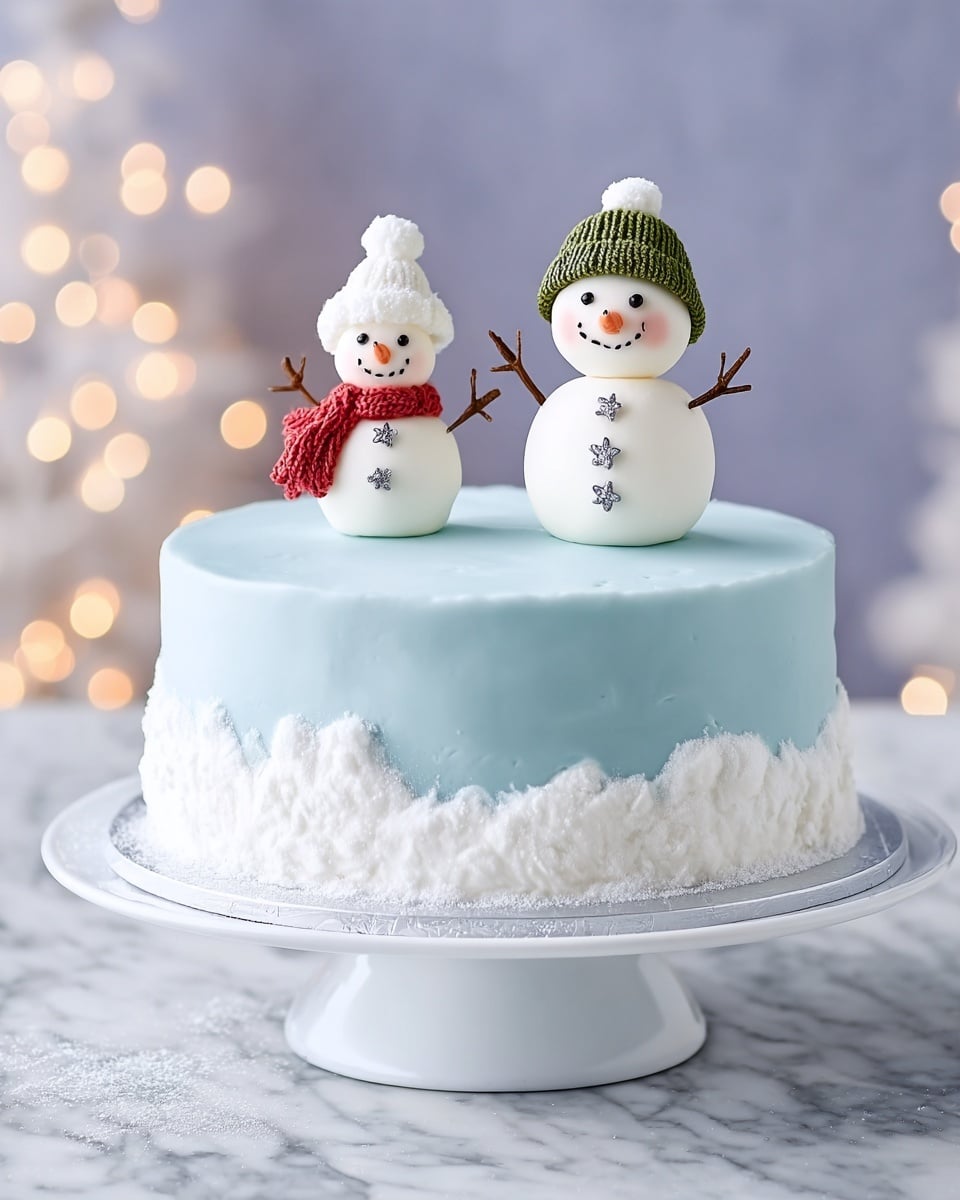
Create a charming winter scene on your cake with this delightful Snowman Friends cake decoration. Using marzipan, regal icing, and a few simple decorations, you can bring a festive touch that will impress family and friends.
Ingredients
- 85g apricot jam
- 100g sifted icing sugar, plus extra for dusting
- 750g marzipan
- 2kg ready-to-roll regal icing
- Blue, brown, orange and green food colouring
- 85g desiccated coconut
- A few whole cloves
- 3 strawberry laces
Instructions
- Step 1: Melt the apricot jam, then sieve it. Brush a little evenly over a 23cm cake to help decorations stick.
- Step 2: On a surface lightly dusted with sifted icing sugar, roll out the marzipan into a circle large enough to cover the cake. Hang it over your rolling pin, then carefully drape it over the cake and smooth it down the sides. Trim any excess from the bottom.
- Step 3: Colour the regal icing with a little blue food colouring. Brush the marzipan-covered cake with more apricot jam, then cover it with the blue icing using the same draping method. Trim the base neatly.
- Step 4: Roll two-thirds of the remaining regal icing into a long, thin sausage on an icing sugar-dusted surface, measuring it to go around the cake. Roll it out to about 5cm wide and trim one edge straight and the other into a wiggly edge.
- Step 5: Keep the trimmings and shape half into two wobbly circles for snowmen to sit on. Brush the strip, circles, and cake base with runny icing (100g sifted icing sugar mixed with a splash of water). Scatter desiccated coconut over these pieces, pressing gently to stick.
- Step 6: Beginning at one end, wrap the coconut-covered strip around the base of the cake. If it’s difficult, use two half strips and more coconut to hide joins.
- Step 7: Roll the remaining regal icing into two large balls, two medium balls, and two small balls. Assemble these into two snowmen by slightly squashing the pieces together. Brush cocktail sticks with brown food colouring and insert for arms.
- Step 8: Insert whole cloves into one snowman for buttons. Colour some strip trimmings orange and shape small carrot noses around pointy ends of cloves. Make tiny holes for the noses with a clove, apply runny icing to the holes, and stick on noses firmly.
- Step 9: Using a black or brown writing icing pen, dot eyes and smiley mouths onto the snowmen. Mark tiny holes with a cocktail stick first to help keep the icing precise and in place.
- Step 10: Colour regal icing trimmings green for a woolly hat. Shape a hat with a thumb dip for the head, add a small ball on top attached with runny icing, and wrap a thin strip around the base. Use a cocktail stick to add woolly markings and texture.
- Step 11: Knot the strawberry laces at one end, then tightly plait a 10cm length and knot again. Snip the ends to create tassels about 1cm long. Wrap the plaited scarf around the neck of the other snowman.
- Step 12: Place the wobbly coconut-covered islands on top of the cake, then carefully set a snowman on each island to complete your snowy cake scene.
Tips & Variations
- Use a piece of kitchen string to measure the icing strips for a precise fit around your cake.
- For added sparkle, lightly dust the coconut with edible glitter before attaching.
- If you don’t have regal icing, fondant icing can be a good substitute with similar results.
- Try different food colours for hats and scarves to create unique snowman outfits.
Storage
Store the decorated cake in a cool, dry place, covered loosely with a cake dome or in a cake box. Avoid refrigeration as it can cause condensation on the icing. The cake decoration will keep well for up to 3 days. If needed, bring to room temperature before serving.
How to Serve
Serve this delicious recipe with your favorite sides.
FAQs
Can I use fondant instead of regal icing for the snowmen?
Yes, fondant works similarly and is a good alternative if regal icing isn’t available. It can be rolled and shaped just as easily for your snowmen and decorations.
How do I prevent the marzipan from drying out?
Apply the apricot jam as a glaze before covering the cake with marzipan; this helps seal in moisture and provides a tacky surface for the marzipan to stick to, preventing drying and cracking.
Print
Snowman Friends Cake Decoration Recipe
- Total Time: 45 minutes
- Yield: 1 decorated 23cm cake serving 12-16 people 1x
Description
Create a charming Snowman Friends Cake adorned with colorful royal icing decorations and delightful marzipan and apricot jam base. This whimsical cake features adorable snowmen crafted from regal icing, coconut snow effects, and vibrant edible accents that bring a festive winter wonderland to your dessert table.
Ingredients
Base & Icing
- 85g apricot jam
- 100g sifted icing sugar, plus extra for dusting
- 750g marzipan
- 2kg ready-to-roll regal icing
Coloring
- Blue food colouring
- Brown food colouring
- Orange food colouring
- Green food colouring
Decoration
- 85g desiccated coconut
- A few whole cloves
- 3 strawberry laces
Instructions
- Ice the Cake: Melt the apricot jam and sieve it, then brush a thin layer evenly over a 23cm cake (use an apricot & almond fruitcake for best results). On a surface lightly dusted with sifted icing sugar, roll out the marzipan into a circle large enough to cover the cake; check with kitchen string. Lift the marzipan by draping it over your rolling pin and place it over the cake, gently patting and smoothing down the sides. Trim any excess at the bottom.
- Cover with Colored Icing: Tint the regal icing with a small amount of blue food colouring. Brush more apricot jam over the marzipan-covered cake, then cover it with the blue royal icing using the same rolling and draping method. Smooth the icing down the sides carefully and trim the base.
- Add Snow Accents: Roll two-thirds of the remaining regal icing into a long, thin sausage on an icing sugar-dusted surface; it should be long enough to go around the cake (measure with kitchen string). Flatten it to about 5cm wide using a rolling pin. Use a sharp knife to create one straight edge and trim the opposite edge into a wavy line. Reserve all trimmings. Compress half of the trimmings into two irregular circles to serve as snowmen bases. Brush the strip, two circles, and the very bottom edge of the cake with runny icing made by mixing 100g sifted icing sugar with a splash of water. Sprinkle desiccated coconut over these parts and gently press to adhere. Starting with one end, stick the strip around the base of the cake. For a neater look, divide the strip into two halves and use additional coconut to conceal seams.
- Shape the Snowmen: Using the remaining third of the regal icing, roll out two large balls, two medium balls, and two small balls. Stack and gently press them together to form two snowmen figures. Brush four cocktail sticks with brown food colouring and insert them as arms on the snowmen.
- Add Buttons and Noses: Embed several whole cloves vertically onto one snowman to mimic buttons. Tint some trimmings with orange food colouring and shape into tiny carrot noses fitted around the pointy ends of two cloves. Use a third clove to create small holes on the snowmen’s faces where the noses will attach. Dab a bit of runny icing in these holes and firmly stick the noses, pressing slightly to secure.
- Create Smiley Faces: Use a black or brown writing icing pen to draw eyes and smiling mouths on each snowman. To avoid mistakes, lightly mark tiny holes with the end of a cocktail stick first to guide your drawing and help keep the icing in place.
- Make the Hats: Tint another portion of the saved regal icing with green food colouring. Shape most of it into a woolly hat form with a thumb indentation at the bottom where it will fit on the snowman’s head. Roll a small ball to place on top of the hat and attach it using runny icing. Cut a thin strip to surround the hat base for decoration. Use a cocktail stick to add textured lines mimicking knit patterns and roughen the ball on top. Use additional runny icing to secure the hat onto each snowman’s head.
- Form the Scarf: Tie the ends of the three strawberry laces together, then tightly plait a 10cm length and knot the end again. Trim the ends with scissors, leaving about 1cm for tassels. Wrap this braided lace neatly around the neck of the second snowman to form a scarf.
- Final Assembly: Position the two coconut snow circles on top of the cake as snowy islands. Place a snowman on each one to complete the festive and charming Snowman Friends Cake decoration.
Notes
- Use apricot & almond fruitcake as cake base for best results.
- Keep the work surface lightly dusted with icing sugar to prevent sticking.
- When coloring the icing, add food coloring sparingly to achieve the desired hue without altering texture.
- Runny icing should have a smooth, pipeable consistency; adjust with water or icing sugar as needed.
- The cocktail sticks not only help hold arms but aid in decorating details like hats and noses.
- Work gently when handling the decorated snowmen to avoid damage before serving.
- Prep Time: 45 minutes
- Cook Time: 0 minutes
- Category: Dessert Decoration
- Method: No-Cook
- Cuisine: British
Keywords: snowman cake, cake decoration, royal icing, marzipan cake, festive cake, winter cake, holiday dessert